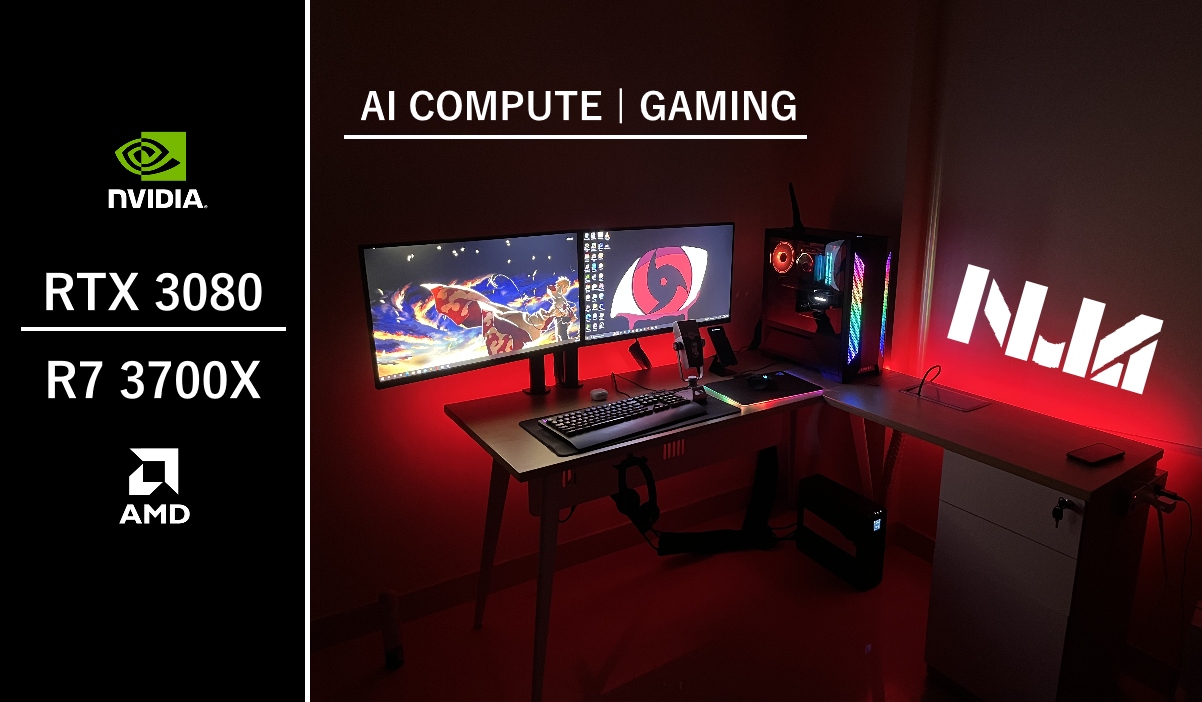
In this blog, we shall embark on a journey to witness how a gaming and AI compute optimized rig we built. Powered by an Nvidia RTX 3080 and an AMD Ryzen 7 3700X, it’s a unique beast!
We named this rig Sharingan, inspired from the anime Naruto. The name symbolizes, “Eye of the Heart” which basically is an indirect reference to tech rivalry and friendship between the semiconductor giants – Nvidia & AMD. Let’s dive in to learn more about DIY PC building basics and finetuning it for both research compute/gaming needs.
What You Will Learn
- Why it’s very critical to choose each and every PC component wisely
- Few pointers about DIY PC Building
- Striking the trade-off between performance and price
- Rig performance validation with gaming and AI benchmarks
- A good takeaway on PC hardware knowledge
TL;DR
You can watch our video which summarizes everything along with gaming and AI benchmarks.
Purpose
To build a rig, we definitely need a motive. Else why spend so much moolah on it, right? I wanted to pursue my research interests on Deep Learning which included my Masters AI thesis. Also, I wanted to do a tad bit of gaming whenever I would be free along with rendering videos for our channel of course! Hence, for the same a local powerhouse rig is of the essence. Consequently, I made up my decision to save up money earned from desk job as much as possible to build a powerhouse sassy rig which would fulfil my purpose.
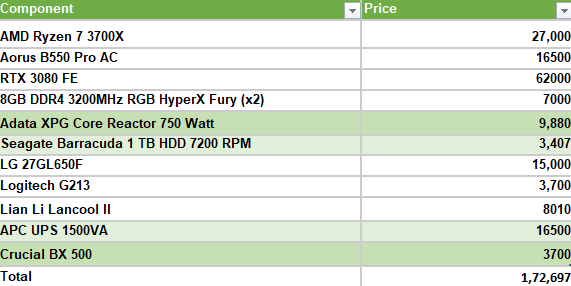
Specsheet
My friend Sourav aka Nova and I brainstormed and discussed a lot to decide the right set of components for the rig that I was planning. The specsheet below should provide you an overview from a BOM perspective.
Components Drill Down & Rig Building
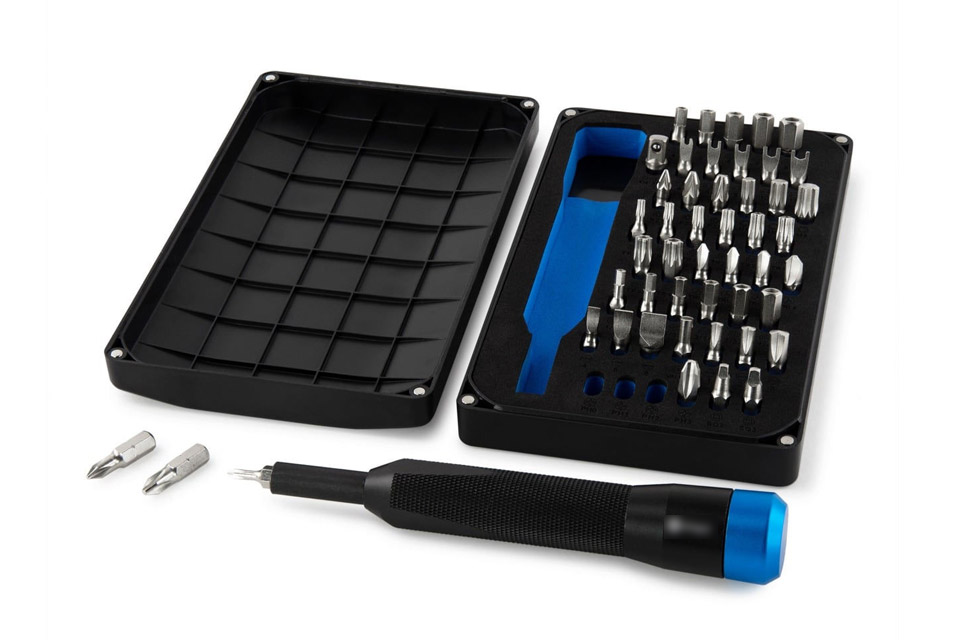
When it comes to rig building, both magnetic flat-head and star-shaped screwdriver shall be your default friend. In contrast to normal screwdrivers, they provided the added benefit of preventing the screws from falling. While you can tinker around getting the right set of toolkits, the screwdriver that we suggested should be enough. Now let’s proceed into the knowing about the components that we picked, in details.
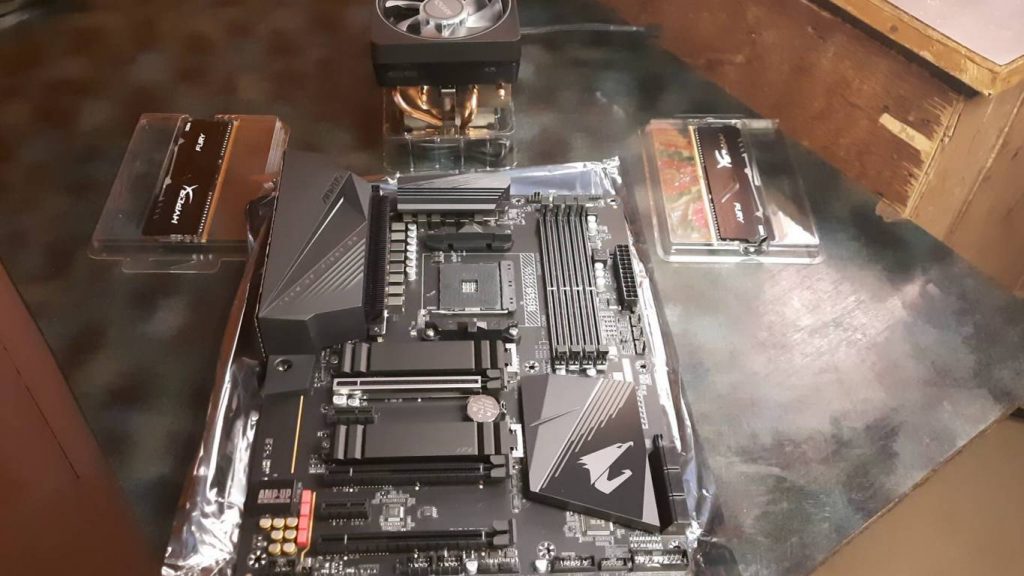
Motherboard
It was a tough choice to call. In our budget plan, only mid-range ATX mobos could be considered. After a lot of research and important pointers thanks to a GamersNexus video, we had two options – The AORUS B550 Pro AC Gaming WiFi and ASUS ROG Strix B550-F Gaming. The former was our choice finally, for its inbuilt WiFi adapter and relatively better thermals.
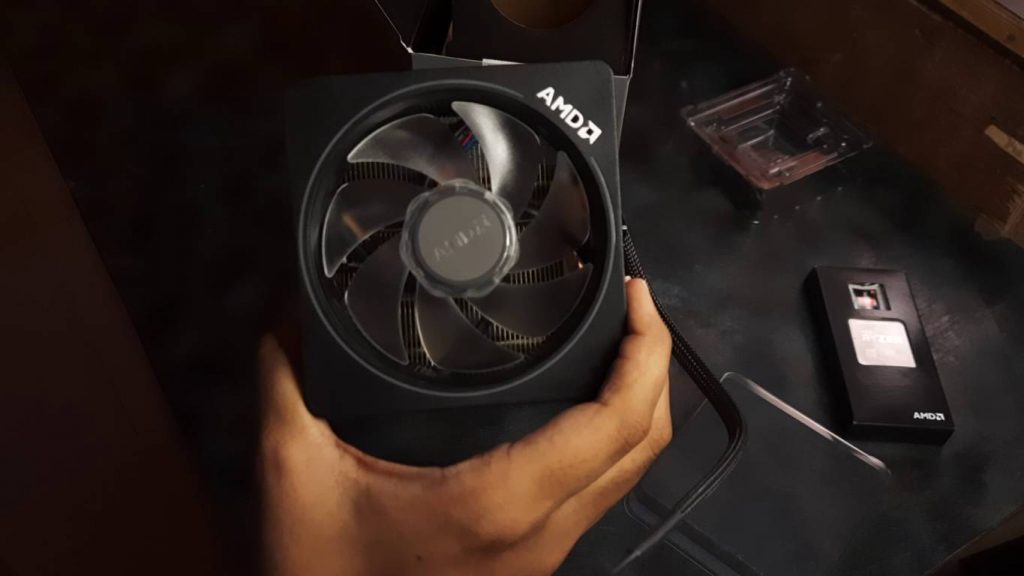
The Heart (CPU)
At the time of building the rig, Intel Alder Lake was not revealed yet and our ideal choice was to go with AMD. The latter CPUs are known for their raw power and SOTA tech. Hence, as per our budget plan, we were conflicted with two options – AMD Ryzen 5 5600X or Ryzen 7 3700X? The former had Zen 3 micro-architecture and performed better in single-threaded performance. On the other hand, the 3700X was an octa-core Ryzen 7 variant featuring Zen 2+ microarchitecture.
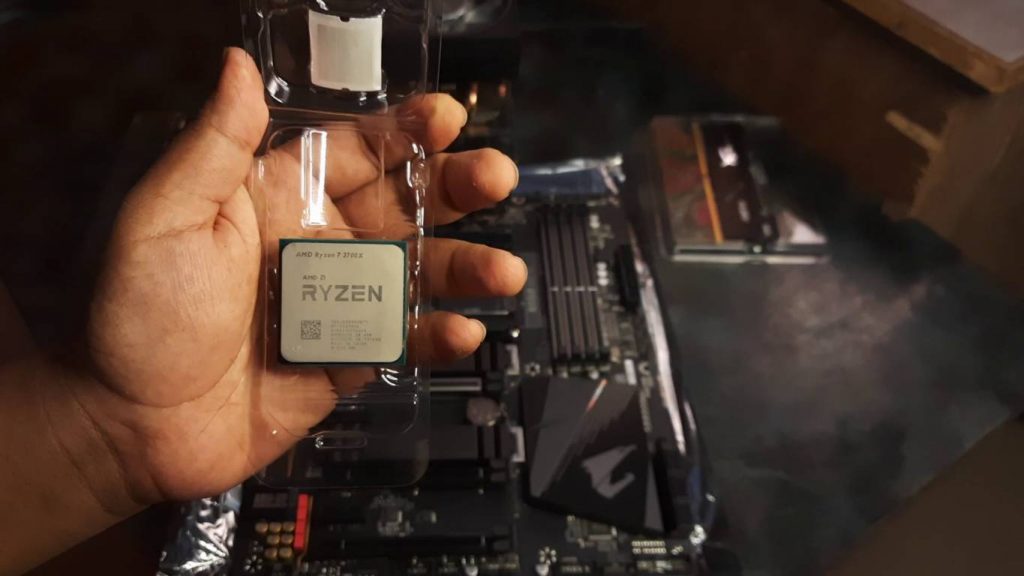
One could possibly argue to choose 5600X instead which is packed with latest firmware, technologies and architectural perks. However, my requirement primarily was to make a rig which would cater to AI workloads. While a good GPU would definitely be the dominant accelerator, for I/O and ETL tasks rather a good CPU plays a vital role. Unquestionably, the 5600X is a good fit. However, it’s a hexacore processor which means we can utilize 12 threads for multi-tasking/threading. Whereas, in 3700x the raw parallel computing performance is higher comparatively due to the availability of 16 threads.
5600X would have been a good option for someone whose application workloads primarily relied on single-threaded performance. Hence, for gaming it would have been the better counterpart for the GPU. However, in our case, the Ryzen 3700X seemed to be a better fit. Moreover, due to better raw power, most of the people rather opt for 3700X for content creation (video editing, gfx rendering, etc.). The price also seemed to be much lower for 3700X in comparison to that of 5600X. Hence, we had our answer.
In addition we forgot to mention that 3700X being a Zen 2 AMD CPU, was one of the first to feature 7nm transistors.
Memory
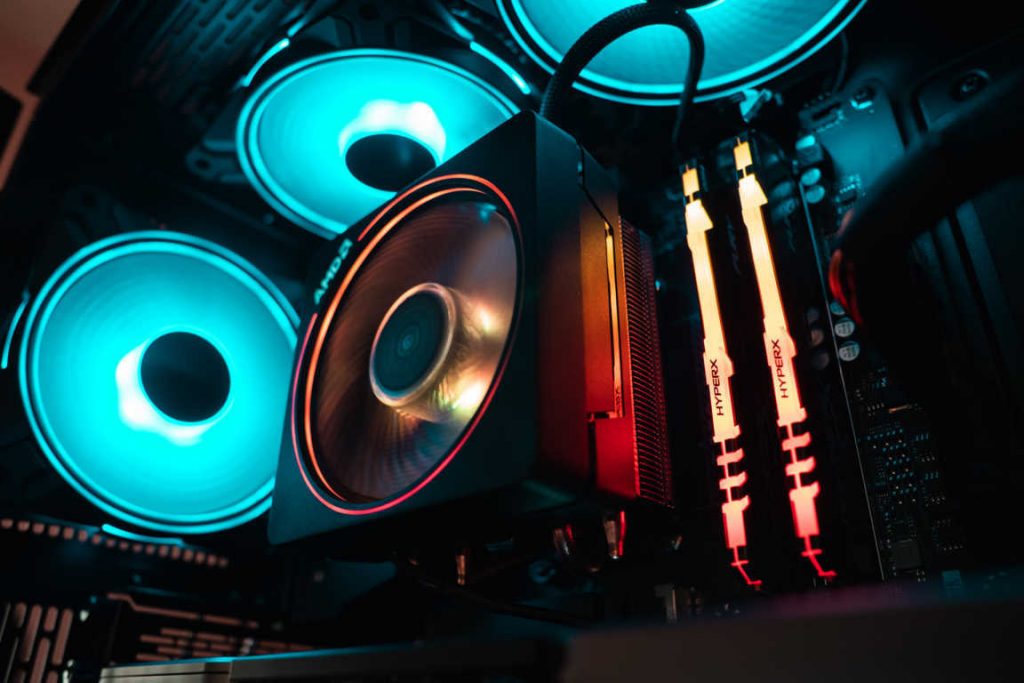
Remember that memory (RAM) plays a vital role in back-and-forth data exchange between clock cycles of the processor. Hence, it is to be noted that the DDR rate (in MHz), and memory size should be the decisive parameters to fit your use-case. Hence, it’s recommended to not spend extra and purchase like 64 GB of memory just to play CSGO. For me, 2 x 8 GB sticks were sufficient to curb my hunger. Especially relevant, it’s recommended to purchase 2 RAM sticks of your desired memory size to take vantage of the DIMM slots.
We went ahead with purchasing two ‘8GB DDR4 3200MHz RGB HyperX Fury RAM‘ sticks. Of course, there were alternatives too, but HyperX was primarily chosen for its decent performance and eye-candy design (fancy RGB included).
The GPU Beast
Now, we shall talk about the most important holy relic of the rig. Most noteworthy, there wasn’t any choice to be made here. Given the budget I planned, it was obvious for me to choose the RTX 3080 Founders Edition (10 GB variant). Yes, I was lucky somehow to get it at official MRP (i.e. 62k INR). The Ampere architecture beast features 8704 CUDA cores, 272 Tensor Cores, 68 Ray-Tracing (RT) Cores and 8 nm transistors.
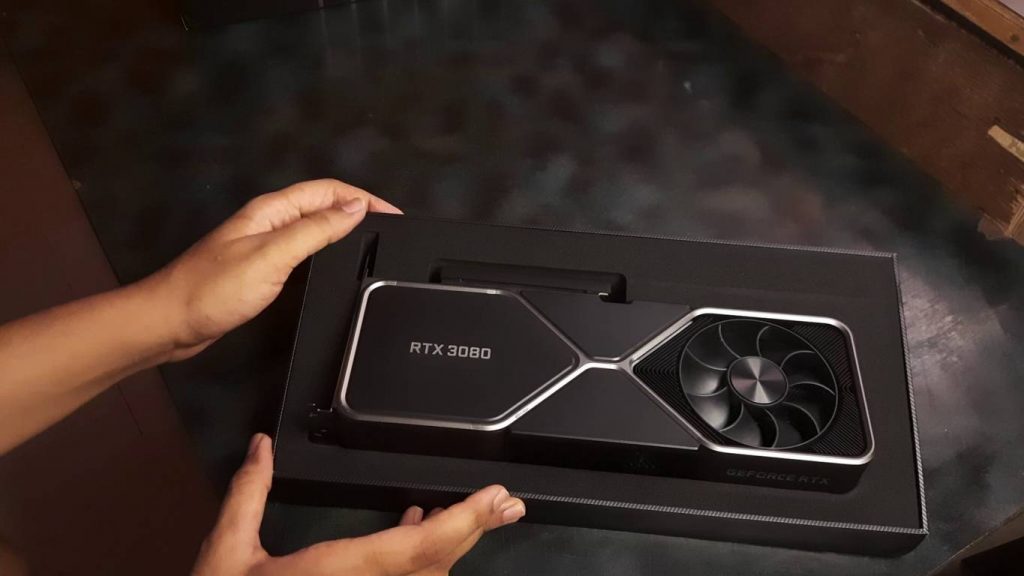
In contrast the predecessor Turing GPU RTX 2080, packs 2944 CUDA Cores, 368 Tensor Cores, 46 RT Cores, 12nm transistors and 8 GB VRAM. The base clocks are more or less the same approximately in comparison to its successor. While one could argue here that although RTX 3080 is equipped with more treasures, the number of Tensor Cores are relatively lesser than its predecessor. Hence, the GPU’s AI workload performance could be lower. However, that’s not the case because there’s a huge architectural leap with a greater number of transistors, better memory, much more CUDA cores that take advantage of the same.
Especially relevant, the 3000 series Founders Edition cards have been designed efficiently to facilitate better cooling. In fact, the dual-sided fan design featured from RTX 3080 onwards is a huge benefit. By that way the heat is dissipated at either direction. AMD’s RDNA GPUs also offer good performance per dollar. But globally it’s very difficult to purchase them. Also, an AI/HPC enthusiast won’t get the benefit of Nvidia’s rich developer software ecosystem, if Team Red GPU is taken into consideration.
Storage
The amount and type of storage for a rig needs to be decided very carefully for a dev-gamer. Because for your gaming needs you might want to opt for a Windows OS, and for developmental requirements you will most likely go ahead with Linux. Dual booting on same storage is not recommended. The best course of action would be to allocate separate storage units to individual OS.
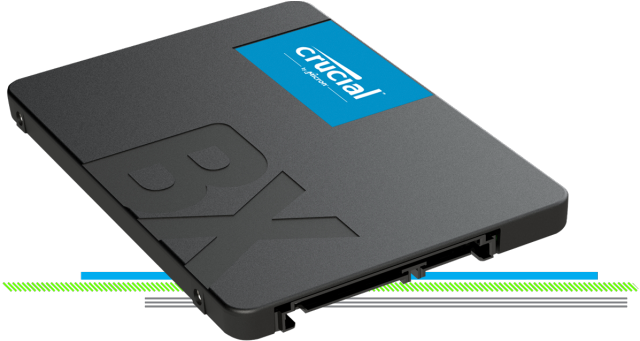
Hence, we decided to make use of my WD Green 128 GB SSD (from old rig) for Ubuntu and a Crucial BX500 (480 GB) SSD for Windows. We also opted to include a Seagate Barracuda 1 TB HDD in the list to accommodate additional storage requirements. My thought was it could be required for Windows given, I was to install more software and games. However later, the opposite happened. It was Ubuntu which rather required more storage due to my heavy-duty Deep Learning research, training large sized models and of course working with many docker containers. The 1TB HDD turned out to be a huge bonus for the same.
It is to be noted that Samsung Evo SSD would have been a much better option. Infact we also thought about purchasing Gen4 SSDs as well. However, Crucial BX500 due to its cheaper price, local availability and decent performance, made it to the cut for the rig. On the other hand, the Gen 4 SSDs could have been of advantage in specific cases like GPU Direct Storage. The SDKs for the same till date haven’t been out yet and hence, we didn’t consider them.
Powerhouse (PSU)
Without enough, right and quality amount of juice, your PC will surely die/care to even boot! Hence, Gold and Platinum rated PSUs are the standard to go with. To help you calculate the estimated wattage for your planned rig, there are amazing utilities like OuterVision. As per our requirements, we deliberately needed a 750W PSU to be on the safe side.
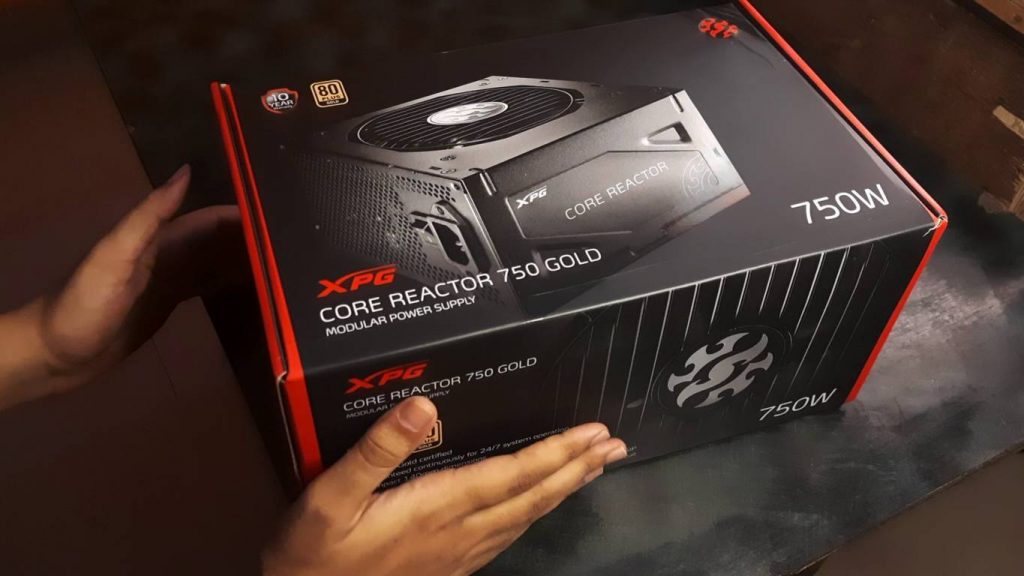
Once again, we hit a dilemma. We were primarily gunning for a Corsair RM series model but sadly it was not available in the market during the time of purchase. One good alternative to choose was the ADATA XPG Core Reactor which is basically a rebrand of Seasonic. The latter is definitely a reputed power supply brand but sadly doesn’t have a presence in India due to availability and after sales. As a matter of fact, what better to choose if there is a rebranded model available with good after-sales support?
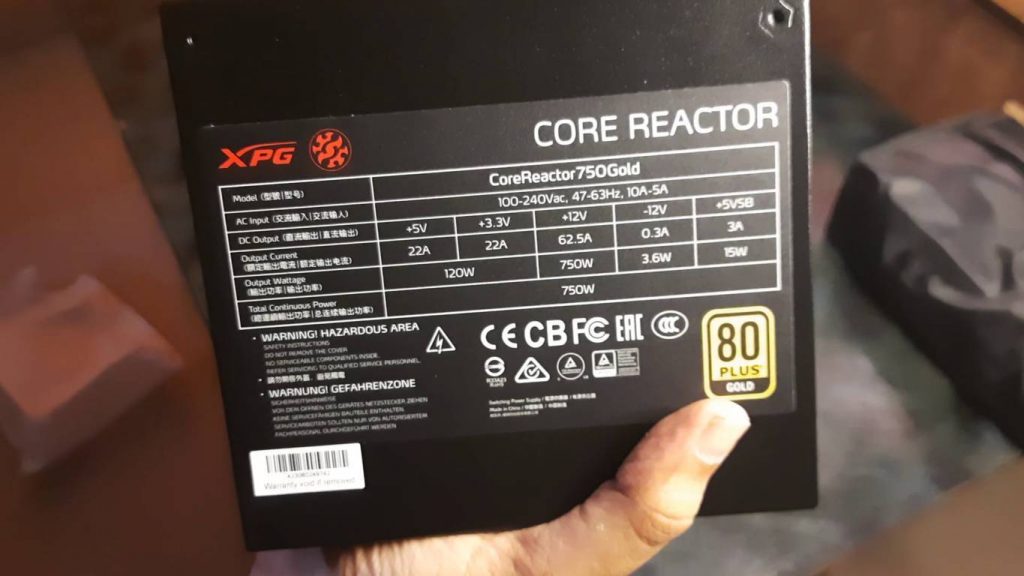
Based on our usage so far, the XPG Core Reactor has been doing a tremendous job, and we are happy with it.
Cabinet & Cooling
One of the most important aspects in DIY PC Building is how you handle the cooling. This can impact the longetivity of a PC in the long run because a boxed cabinet with lack of vents would just convert your rig into an active volcano! In addition, good air exhaust fans, radiators and AIOs play a huge role in toning down the overall temperature of a rig.
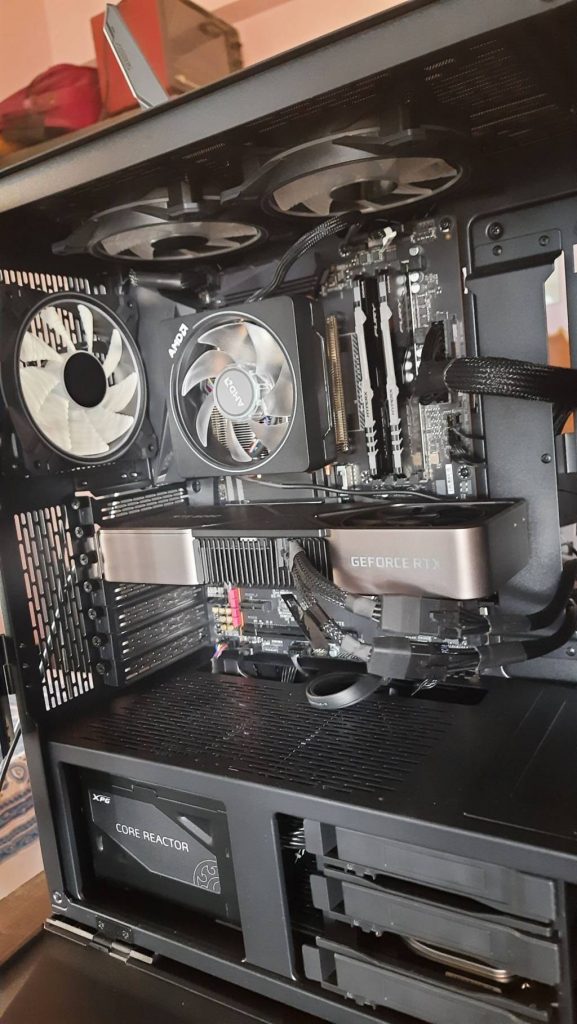
Firstly, as recommended by Steve, the Lian Li cabinets are the best in aesthetics, features and thermals. Hence, we finalized to purchase the LianLi Lan Cool Mesh II which is the best cabinet out there in terms of thermal engineering. However, during the time of purchase the cabinet was not available but its predecessor was. The prequel Lian Li Lancool II doesn’t have a mesh-front but rather a cool next-gen part mesh-opening with inbuilt RGB LEDs. They make it look so cool! However, it’s not that great in thermals as compared to its Mesh-Front counterpart. Destiny wanted me to enjoy the cool aesthetics instead I believe!
Since, the Ryzen 3700X comes equipped with a Wrath Prism air-cooler (which is decent enough), we didn’t buy any AIO. The cabinet came equipped with two from 140 mm fans which we straightforward discarded as we wanted industry standard and reviewer recommened fans. The fans for cooling were architected in the following fashion:
i) Exhaust – To expel the heat out, we ordered a 3-in-1 RGB CF 120 Plus kit by DeepCool. It was something which provides decent cooling in a very reasonable price. Also, it’s RGB could be easily synced with our motherboard lighting software kit. The ring-design act as an added protection to the rotating fans and of course, they make the RGB patterns look eye-candy!
ii) Intake – For intake we went ahead with 2 x Arctic Non RGB 140 mm fans. Arctic fans are industry popular and moreover, it was logical to purchase non RGB fans instead. Because, as we mentioned earlier, the cabinet featured in-built front RGB LEDs with part-mesh visibility.
UPS
Powercuts can be a big nuisance, especially when you are doing something strenuous and important in your rig. To avert the same, all you need is a good UPS which can provide you with enough minutes of backup to sustain till the power is back.
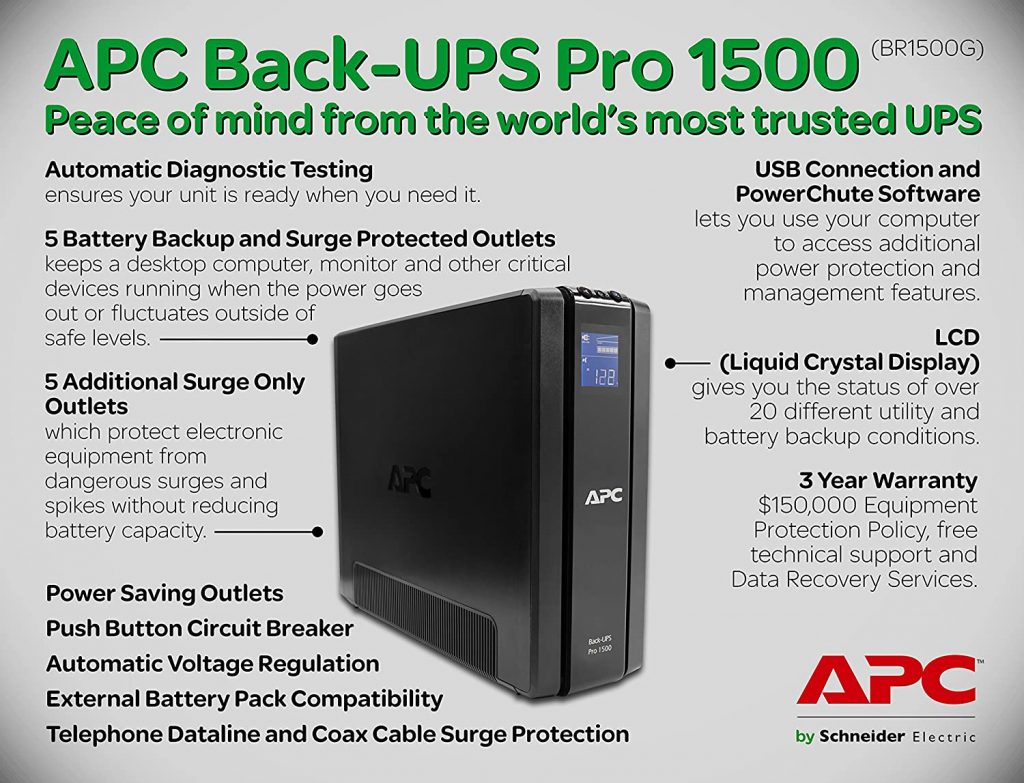
APC, now a part of Schneider Electric, are the de facto standard in PC and server power backup units. In our case, we purchased the APC Back-UPS Pro 1500 VA costing roughly 18k INR. Based on my usage and rig specifications, I have observed the UPS providing a backup power for almost 40 plus minutes in Windows and even beyond with Linux on idle workloads. When, say the PC is in suspended or sleep mode, the number goes beyond 100 minutes! So, you can take your rig happily to any Indian village and infact not bother much about power-cuts.
Accessories
Keyboard – Purchased the Logitech Prodigy G213 RGB membrane keyboard which cost me roughly 4K INR. It’s not mechanical but does the job. It packs with good onboard color changing patterns
Mouse – Gifted by my friends, the Logitech G502 Wireless RGB Gaming Mouse is something that I needed as I didn’t want wires clogging on my desk. Especially relevant, it’s programmable gaming buttons and infinite scroll make it handsomely useful. The Indian price for the same is around 12-15k INR.
Gaming Benchmarks
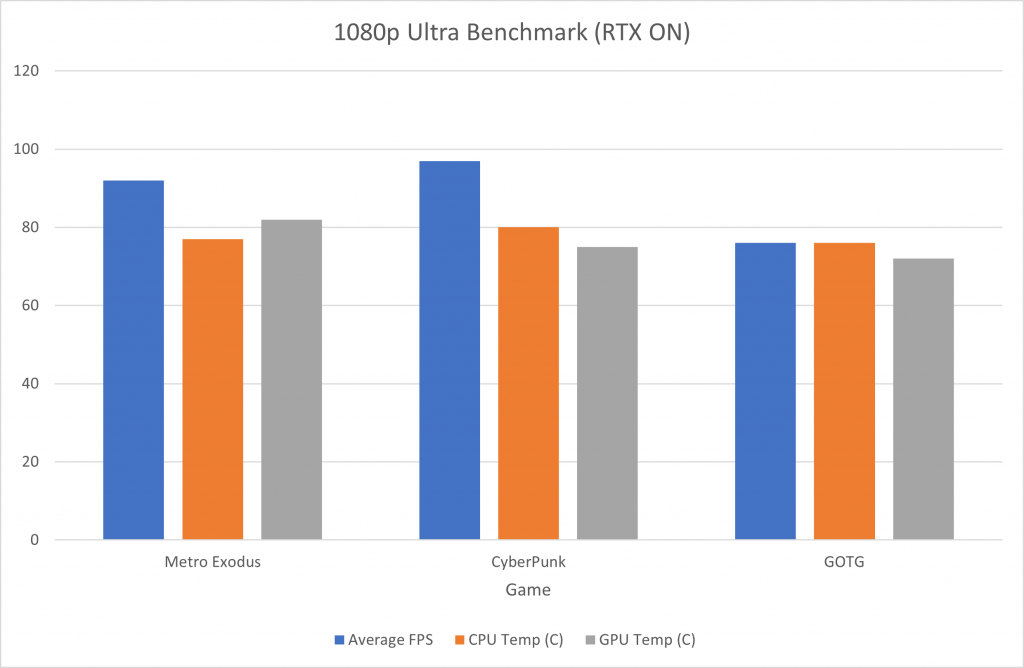
We benchmarked some raytracing supported games on 1080p Ultra. The graph above summarizes the overall performance of the rig which is the best for CyberPunk. Guardians of the Galaxy (GOTG) on the other hand showcased the lowest average FPS. The average GPU and CPU temperatures seem to be a tad similar for all the three games.
One interesting finding from the statistic above is, CyberPunk (being an open-world game) happens to be rather more optimized than the rest. Metro Exodus on the other hand is the oldest game that came up with RTX support recently. It is evident from its realistic jaw-dropping visuals, how demanding it can be.
UniGine
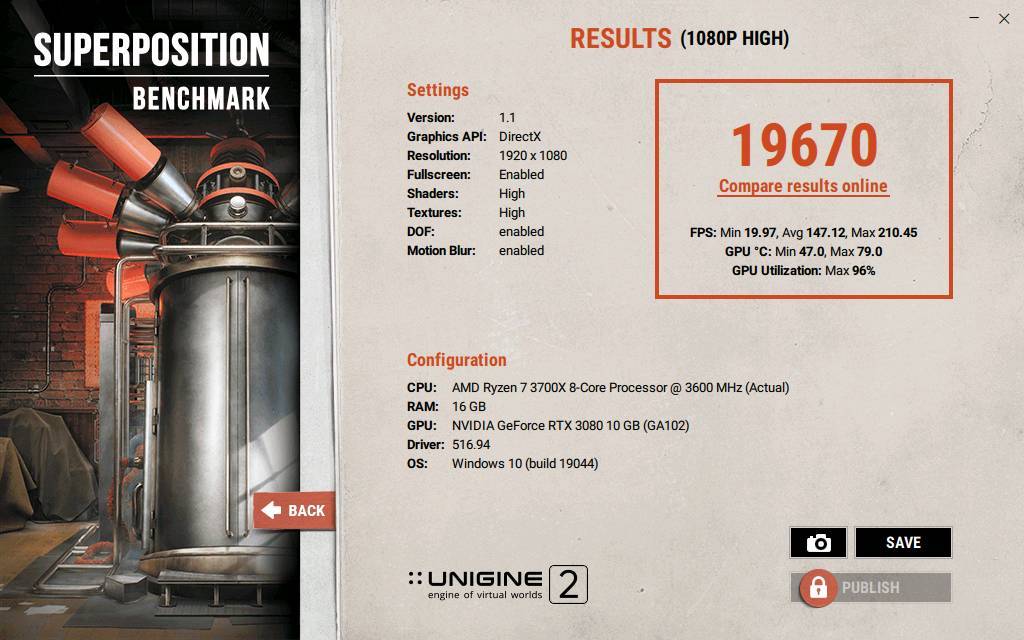
Unigine Superposition is a heavy-duty benchmarking tool which offers stress tests on simulation, gaming and virtual reality. We performed a benchmark test with the same tool. It adhered to almost every graphics simulation aspect possible with dynamic lighting, shadows, textures, shaders and physics. Our rig achieved around 147 FPS in average with around 210 as the max FPS.
The tool stressed out the RTX 3080 to a max utilization of 96% and a max temperature of 79 degrees (Celsius) .
AI Computing Performance
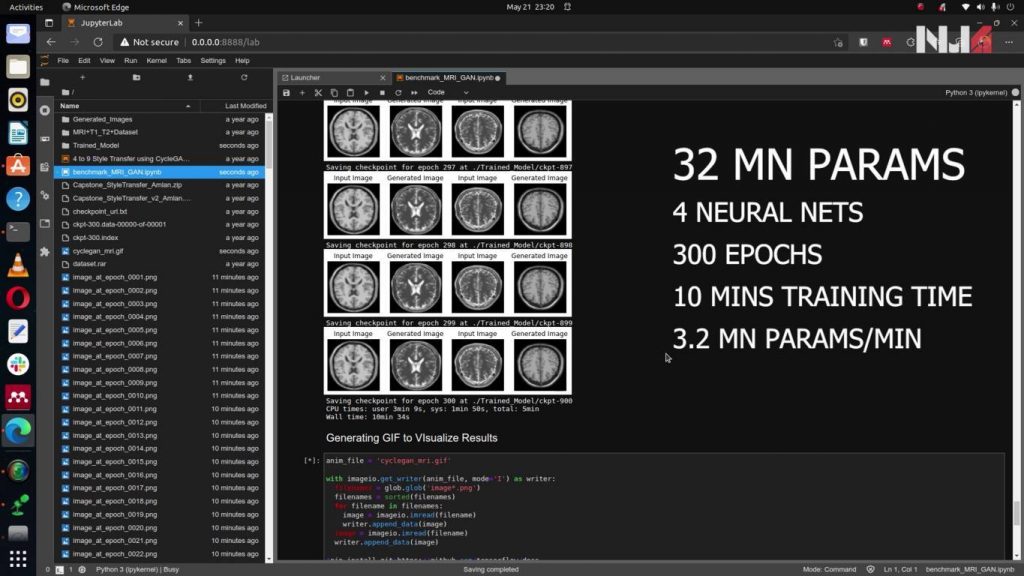
Finally, it was time to test the true colours of both RTX 3080 and Ryzen 7 3700X! To utilize the tensor cores of the GPU and all the threads of the CPU, we trained a complex AI model from scratch. It was not the go-to transfer learning but training a Cycle-GAN model to generate brain MRI images of various contrasts.
The Cycle-GAN architecture comprises of four neural nets. Based on the hyperparameters we provided, the total number of trainable params turned out to be whooping 32 million! The total time spent on the training the model was around 10 minutes with 300 epochs. To help with a rough comparison, training the same in a non-tensor core GPU (say GTX 1080) would easily take an hour or even more than that. The same pipeline on just a powerful CPU infact, could take a future Loki visiting your current timeline, with the objective to forcing you leveraging GPUs for this task!
Verdict & Future Improvements
We still believe, there is room for more improvement. The first plan is to increase the storage which would help in content creation and maintaining large docker images in Ubuntu. The next idea is to add an AIO cooler to make the rig more overclocking friendly. In addition, more RGB is always welcome to augment the beauty of rig!
Hope, you enjoyed reading the blog. Do share your feedback and questions in the comments section!
2 Comments
Bala Subrahmanya Sharma Vedam
Wonderful work!
Looks Nerdy and Awesome, Nerdy! 🙂